
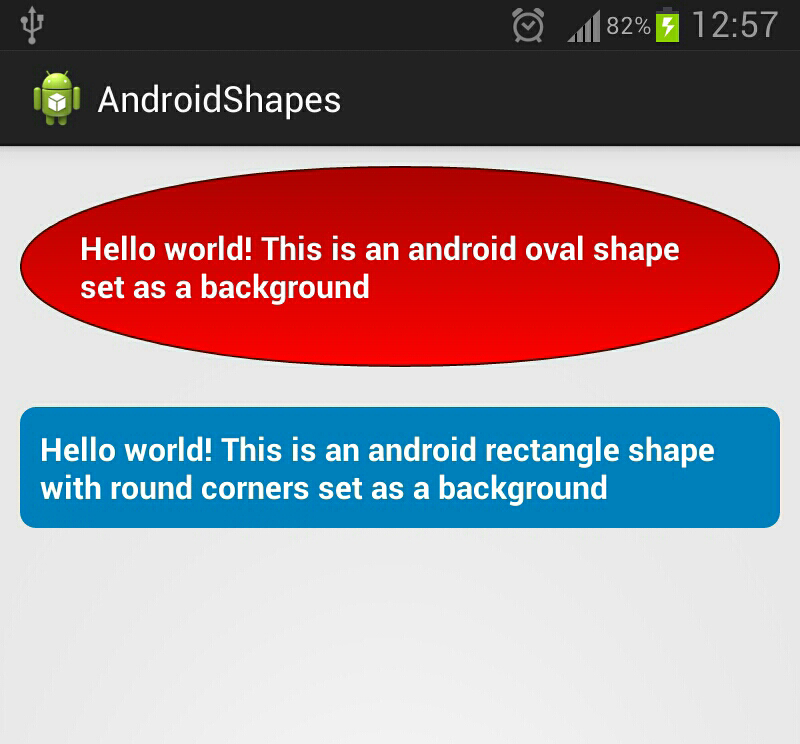
Today we are going to be creating shapes in android. And by that I mean drawable shapes. We create define them via an XML file which resides inside the drawables folder. In Android, you can define a shape so that it has a stroke, a solid color or a gradient, whether you want corners, and (of coarse) the type of shape you want to define.
Defining our shape
In this post we will define the following shapes:
Lets create our oval shape
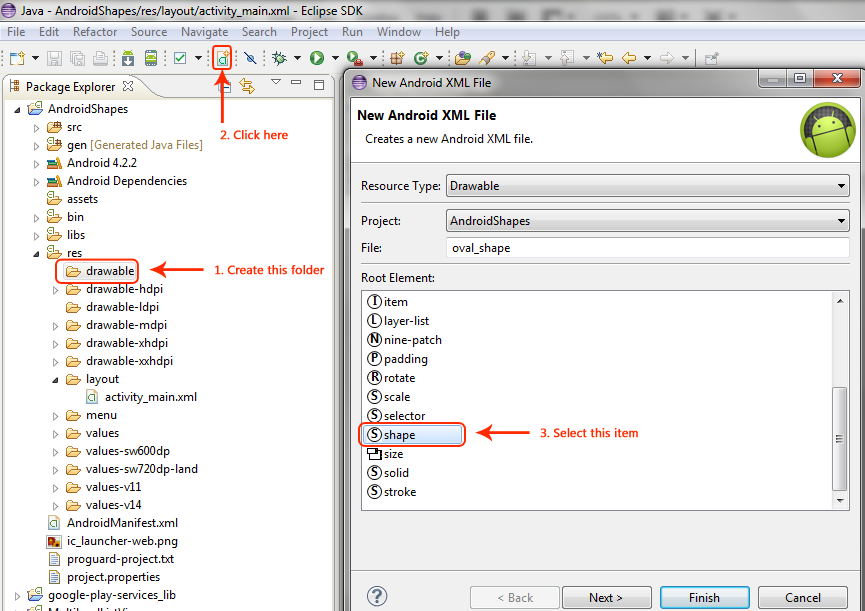
- Create a file named
drawablein the res folder - Create a new XML file named
oval_shape.xmlinside that folder
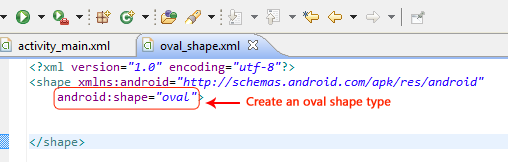
Now lets define our oval shape. Remember the root note is <shape> in this case. Take a look at the following screenshot:
This is the rest of the oval shape definition which has a linear gradient starting from a dark red to a light red, with padding, and has a maroon stroke to it:
<?xml version="1.0" encoding="utf-8"?>
<shape xmlns:android="http://schemas.android.com/apk/res/android"
    android:shape="oval">

    <!-- dark red to light red gradient -->
    <gradient android:startColor="#ff0000"
        android:endColor="#ac0000"
        android:type="linear"
        android:angle="90" />

    <!-- Maroon stroke -->
    <stroke android:color="#500b00"
        android:width="1dp" />

    <!-- Padding -->
    <padding android:left="30dp"
        android:right="30dp"
        android:top="30dp"
        android:bottom="30dp" />

</shape>
We will use our shape inside of a TextView in our layout by setting its background property to the above shape. But first let's define our blue rectangle with rounded corners. This file is named rounded_rectangle_shape.xml
<?xml version="1.0" encoding="utf-8"?>
<shape xmlns:android="http://schemas.android.com/apk/res/android"
    android:shape="rectangle">

    <corners android:radius="8dp" />

    <solid android:color="#0080c0" />

    <!-- Padding -->
    <padding android:left="10dp"
        android:right="10dp"
        android:top="10dp"
        android:bottom="10dp" />

</shape>
Alright so we have our two shapes. Now we are going to use them in our layout file by modifying the android:background property like so:
<?xml version="1.0" encoding="utf-8"?>
<LinearLayout xmlns:android="http://schemas.android.com/apk/res/android"
    android:layout_width="match_parent"
    android:layout_height="match_parent"
    android:orientation="vertical"
    android:padding="10dp"
    android:gravity="center_horizontal" >

    <TextView
        android:layout_width="wrap_content"
        android:layout_height="wrap_content"
        android:background="@drawable/oval_shape"
        android:textColor="#ffffff"
        android:textStyle="bold"
        android:textSize="16sp"
        android:text="@string/hello_world_oval"
        android:layout_marginBottom="20dp" />

    <TextView
        android:layout_width="wrap_content"
        android:layout_height="wrap_content"
        android:background="@drawable/rounded_rectangle_shape"
        android:textColor="#ffffff"
        android:textStyle="bold"
        android:text="@string/hello_world_rect"
        android:textSize="16sp"
        android:layout_marginBottom="20dp" />

</LinearLayout>
Comments